使用PHP连接数据库实现留言板功能的实例讲解(推荐)
时间:2017-09-24PHP实现留言板功能:
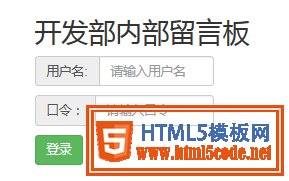
1 首先是登录页面:
<!DOCTYPE html>
<html>
 <head>
  <meta charset="UTF-8">
  <title>留言板登录</title>
  <script src="bootstrap/js/jquery-1.11.2.min.js"></script>
  <script src="bootstrap/js/bootstrap.min.js"></script>
  <link href="bootstrap/css/bootstrap.min.css" rel="external nofollow" rel="external nofollow" rel="external nofollow" rel="stylesheet" type="text/css"/>
 </head>
 <style>
  .header{
   margin-left: 550px;
   margin-top: 150px;
   height: 300px;
   max-width: 300px;
  }
  .xiugai{
   max-width: 200px;
  }
  .login{
   margin-top: 10px;
  }
 </style>
 <body>
  <form action="messloginchuli.php" method="post">
  <div class="header">
   <h2>开发部内部留言板</h2>
   <div class="input-group xiugai">
    <span class="input-group-addon" >用户名:</span>
    <input type="text" class="form-control" name="uid" placeholder="请输入用户名">
   </div>
   <div class="input-group xiugai" >
    <span class="input-group-addon">口令:</span>
    <input type="text" class="form-control" name="pwd" placeholder="请输入口令">
   </div>
   <button type="submit" class="btn btn-success login">登录</button>
  </div>
 </form>
 </body>
</html>
2 登录页面完成后要进入登录处理页面了,也就是上面提交到的messloginchuli.php
<?php
session_start();  // 登录之后要把所包含登录的页面连接起来,开启session
$uid = $_POST["uid"];
$pwd = $_POST["pwd"];
require_once "./DBDA.class.php";
$db = new DBDA();
$sql = "select password from yuangong where username='{$uid}'";
$arr = $db->query($sql,0);
//var_dump($arr[0][0]);
if($arr[0][0]=$pwd && !empty($pwd)){
 $_SESSION["uid"]=$uid;
 header("location:message.php");
}

?>
登录页面效果如图:
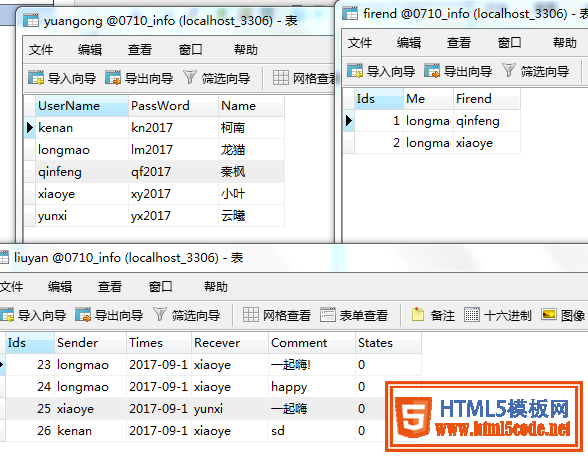
3.登录完成后是进入主页面,也就是显示自己收到的对话内容,下面是设计的数据库的表格和主页面的代码:
<!DOCTYPE html>
<html>
 <head>
  <meta charset="UTF-8">
  <title></title>
  <script src="bootstrap/js/jquery-1.11.2.min.js"></script>
  <script src="bootstrap/js/bootstrap.min.js"></script>
  <link href="bootstrap/css/bootstrap.min.css" rel="external nofollow" rel="external nofollow" rel="external nofollow" rel="stylesheet" type="text/css"/>
 </head>
 <style>
  .mess{
   max-width: 800px;
   margin-left: 250px;
   margin-top: 150px;
  }
 </style>
 <body>
  <?php
  session_start();
  $uid = $_SESSION["uid"];
  if(empty($_SESSION["uid"])){
   header("location:messlogin.php");
   exit;
  }
  ?>
  <div >
   <a href="publish_info.php" rel="external nofollow" >发布信息</a>
   <a href="tuichuchuli.php" rel="external nofollow" >退出系统</a>
   </div>
  <table class="table table-bordered mess" >
   <caption >
    留言信息:
   </caption>

   <thead>
    <tr>
     <th>发送人</th>
     <th>发送时间</th>
     <th>接收人</th>
     <th>信息内容</th>
    </tr>
   </thead>
   <tbody>
    <?php
    require_once "./DBDA.class.php";
    $db = new DBDA();
    $sql = "select * from liuyan where recever='{$uid}' or recever='all'";
    $arr = $db->query($sql,0);
    foreach($arr as $v){
     echo "<tr>
     <td>{$v[1]}</td>
     <td>{$v[2]}</td>
     <td>{$v[3]}</td>
     <td>{$v[4]}</td>
    </tr>";
    }
    ?>

   </tbody>
  </table>

 </body>
</html>
退出登录系统实现用户注销,返回登录页面功能代码如下:
 <?php
session_start();
$uid = $_SESSION["uid"];
unset($uid);
header("location:messlogin.php");

?>
代码写到这里,比较重要的部分就完成了,下面是要进入发布信息页面了,相当于之前写的添加的页面,其处理页面也是和之前没什么区别的,差别在于现在的处理页面是在用户登录的情况下操作的,需要用session把所有的登录情况下的页面连接起来
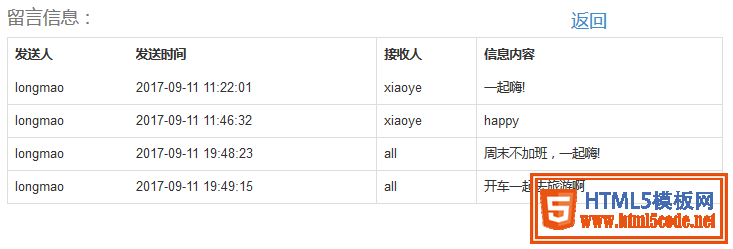
主页面效果如图:

4.最后是信息发布页面,可以给任何人发送信息
 php实现留言板功能(会话控制)这篇文章主要为大家详细介绍了php实现留言板功能,会话控制的案例,具有一定的参考价值,感兴趣的小伙伴们可以
 织梦dedecms后台增加logo上传功能用过dedecms的朋友都知道,织梦cms后台系统基本参数里是无法直接上传图片的,我们更换logo图只能到ftp里替换,非常的不方便
 PHP中递归的实现实例详解递归(http:/en.wikipedia.org/wiki/Recursive)是一种函数调用自身(直接或间接)的一种机制,这种强大的思想可以把某些复杂的概